Getting Started 🚀
Let’s get started with the FullStackHero .NET Starter Kit, the best way to develop a FullStack Multi-Tenant .NET 8 Web App.
The FullStackHero .NET Starter Kit is the ultimate foundation for your next .NET 8 Clean Architecture solution, providing a comprehensive suite of essential packages and features, including built-in Multi-Tenancy support. With its pre-configured setup, this kit can accelerate your project development by saving over 200 hours of implementation time, allowing your team to focus on building core features from day one.

🚀 Goals
With Aspire Dashboard, ASP.NET Core Web API & Blazor Client
✨ Features & Technologies
- ASP.NET Core 8
- Entity Framework Core 8
- Blazor
- MediatR / CQRS Pattern
- Specification Pattern
- Clean Architecture / Verticle Slice Architecture
- Modular Monolith
- Multitenancy with Finbuckle
- Create Tenants with Multi Database / Shared Database Support
- Activate / Deactivate Tenants on Demand
- Upgrade Subscription of Tenants - Add More Validity Months to each tenant!
- PostgreSQL & MSSQL Support Built-In. Can be extended to support any other RDBMS as well
- API Versioning
- Minimal API Endpoints
- Audit Logging to track entity & user history
- Advanced User & Role Based Permission Management
- File Storage Service
- JWT Authentication
- Logging with Serilog
- Response Caching - Distributed Caching + REDIS
- Redis
- FluentValidation
- Containerized with Docker
- Docker-Compose Support
- One Click Deployment to AWS (ECS/RDS/other networking components) using Terraform
- CI Pipeline with GitHub Actions
- Follows Domain Driven Design
Prerequisites
Make sure that you have the following configured / setup on your development machine.
- .NET 8 SDK installed.
- Visual Studio IDE.
- Docker Desktop. (required only if you need the Aspire Dashboard running.)
- PostgreSQL instance running on your machine or docker container.
For more details, please refer to the Development Environment Guide.
Quick Start Guide
To get started with this starter kit, here are the available options.
- Install the NuGet .NET CLI Template.
- Fork the Repository. (Use this if you want to always keep your version of the StarterKit up-to date with the latest changes.)
FSH .NET CLI Template
FullStackHero .NET StarterKit is built to have seamless & developer friendly experience. To build your new .NET project based on this template, the recommended way is to install the .NET template package on your machine.
Install the template by running the following command.
dotnet new install FullStackHero.NET.StarterKitTo get the latest version of the package, visit nuget.org. This Starter Kit is now in release candidate stage.
Once the package is installed, you can create a new instance of the project by running,
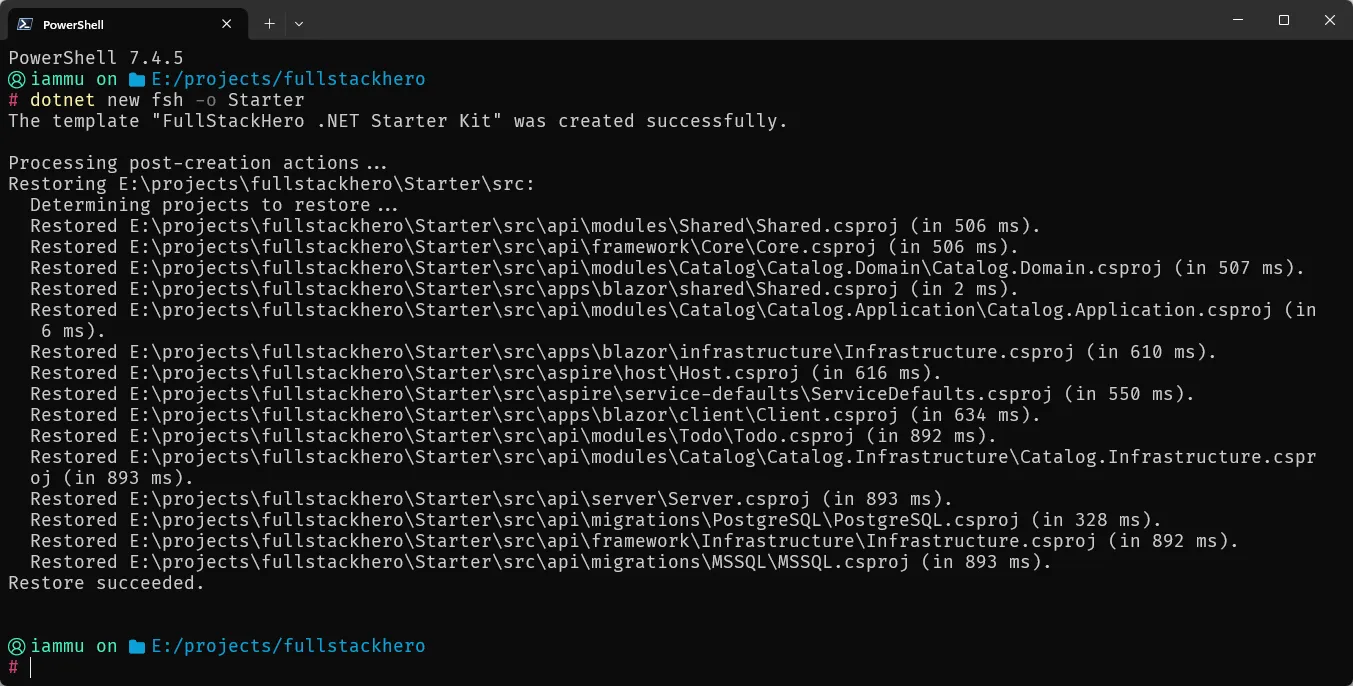
dotnet new fsh -o StarterHere, your new solution name would be Starter.
This would generate your new solution and also ensures that all the required packages are resolved for you.

Forking the Repository
You would probably need to take this approach if you want to keep your source code upto date with the latest changes. To get started based on this repository, you need to get a copy locally.
- Make a fork of fullstackhero’s dotnet-starter-kit repository in your Github account.
- Next, since you need to start your private personal project, create your new dotnet-starter-kit personal project by cloning the forked repository on your personal github. This could be done as simple as running
git clone https://github.com/{yourgithubuseraccount}/dotnet-starter-kit.gitlocally on your development machine. - Setup an upstream remote on your personal project pointing to your forked repository using command
git remote add upstream https://github.com/{yourgithubuseraccount}/dotnet-starter-kitandgit remote set-url --push upstream DISABLE
Now, whenever there is a new update on fullstackhero’s dotnet-starter-kit repository, you could simply pull in the latest change on your private fork of the fullstackhero’s dotnet-starter-kit repository and later merge these changes with you personal projects.
Your First .NET Starter Kit Solution!
-
Open up the
./src/FSH.Starter.sln. -
This would up the FSH Starter solution which has 3 main components.
- Aspire Dashboard (set as the default project)
- Web API
- Blazor
-
Now we will have to set the connection string for the API. Navigate to
./src/api/server/appsettings.Development.jsonand change theConnectionStringunderDatabaseOptions. Save it. Currently the supported database instances arepostgresqlandmssql. By default you can find a PostgreSQL configuration within theappsettings.Development.jsonfile.-
For PostgreSQL,
"DatabaseOptions": {"Provider": "postgresql","ConnectionString": "Server=192.168.1.110;Database=fullstackherodb;User Id=postgres;Password=password"}, -
For MSSQL,
"DatabaseOptions": {"Provider": "mssql","ConnectionString": "Server=192.168.1.104;Database=rootDb;User Id=sa;Password=Password1*;TrustServerCertificate=True;"},
-
-
Ensure that you have docker desktop up and running. If you want to skip the Docker part, you will have to make the default startup project as the
ServerandClientproject. -
Once that is done, run the application.
-
Aspire Dashboard will be running at
https://localhost:7200/. -
API will be running at
https://localhost:7000/swagger/index.html. -
Blazor will be running at
https://localhost:7100/.
👨🚀 Solution Structure
📬 Service Endpoints
todo : can someone update this? Simple run the API and add the route details referring to Swagger.
| Endpoint | Method | Description |
|---|---|---|
/token | POST | Generates Token. |
How to Run?
🧪 Standalone
🐳 Docker Support
☁️ Deploying to AWS
🤝 Contributing
📝 Migrations
-
Run
dotnet tool install --global dotnet-ef -
Navigate to
./api/serverand run the following EF CLI commands.Terminal window dotnet ef migrations add "Add Identity Schema" --project .././migrations/postgresql/ --context IdentityDbContext -o Identitydotnet ef migrations add "Add Tenant Schema" --project .././migrations/postgresql/ --context TenantDbContext -o Tenantdotnet ef migrations add "Add Todo Schema" --project .././migrations/postgresql/ --context TodoDbContext -o Tododotnet ef migrations add "Add Catalog Schema" --project .././migrations/postgresql/ --context CatalogDbContext -o Catalog
✨ About
This starter kit is developed and maintained by Mukesh Murugan under MIT license.
Follow @iammukeshm on X for project related updates.
